
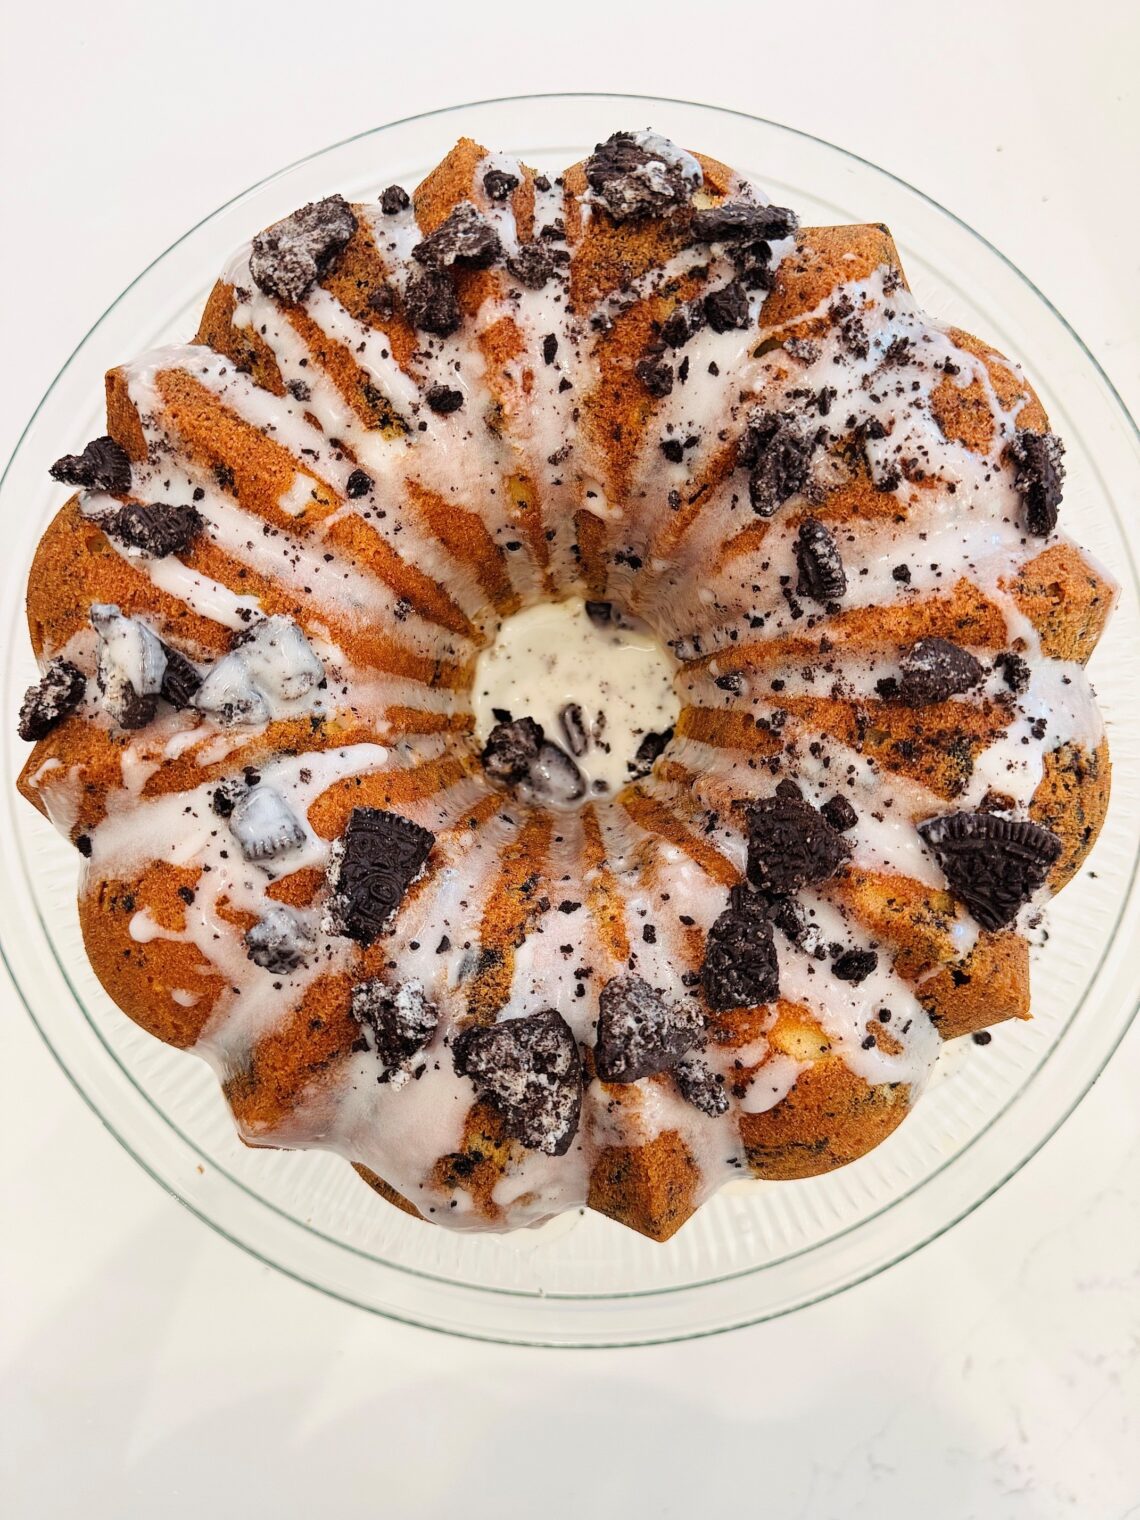
Rich, buttery Oreo Pound Cake packed with crushed cookies and creamy vanilla flavor. It is perfectly moist, chocolate, and irresistible for any dessert lover!
What is an Oreo Pound Cake?
An Oreo Pound Cake is a rich, buttery twist on the classic Southern pound cake, infused with everyone’s favorite cookies-and-cream flavor. Made with crushed Oreo cookies folded into a moist, tender vanilla cake batter, this dessert combines the dense, velvety texture of traditional pound cake with the chocolate crunch and sweet cream filling that have made Oreos a beloved treat for generations. The result is a decadent cake that’s nostalgic, comforting, and impossible to resist.
Whether served plain, dusted with powdered sugar, drizzled with a simple vanilla glaze, or topped with a cookies-and-cream icing, Oreo Pound Cake is a crowd-pleasing dessert that’s perfect for any occasion. It’s elegant enough for holiday celebrations, birthdays, and family gatherings, yet simple enough to enjoy with a cup of coffee or a cold glass of milk any day of the week. If you’re a cookies-and-cream lover, this homemade pound cake is sure to become a favorite recipe you’ll make again and again.
Inspiration Behind My Oreo Pound Cake
My love for cookies and cream runs deep. It’s the kind of flavor that instantly takes me back to childhood. That classic mix of sweet vanilla and crunchy chocolate cookies has always been my weakness, so I wanted to create a dessert that captured that same comfort in a rich, buttery pound cake. The first time I folded those crushed Oreos into the batter, the aroma alone told me I had something special. Every bite feels nostalgic, like the best parts of your favorite ice cream flavor, wrapped up in a tender, homemade cake.
What I adore most about this Oreo Pound Cake is its versatility. It’s truly a dessert for all seasons. It’s cozy enough for winter gatherings, yet cool and fun for summer celebrations. I love serving it during the holidays because it’s always the first dessert to disappear from the table. Whether it’s topped with a simple glaze or a scoop of vanilla ice cream, this cake never fails to bring people together and spark smiles all year long.
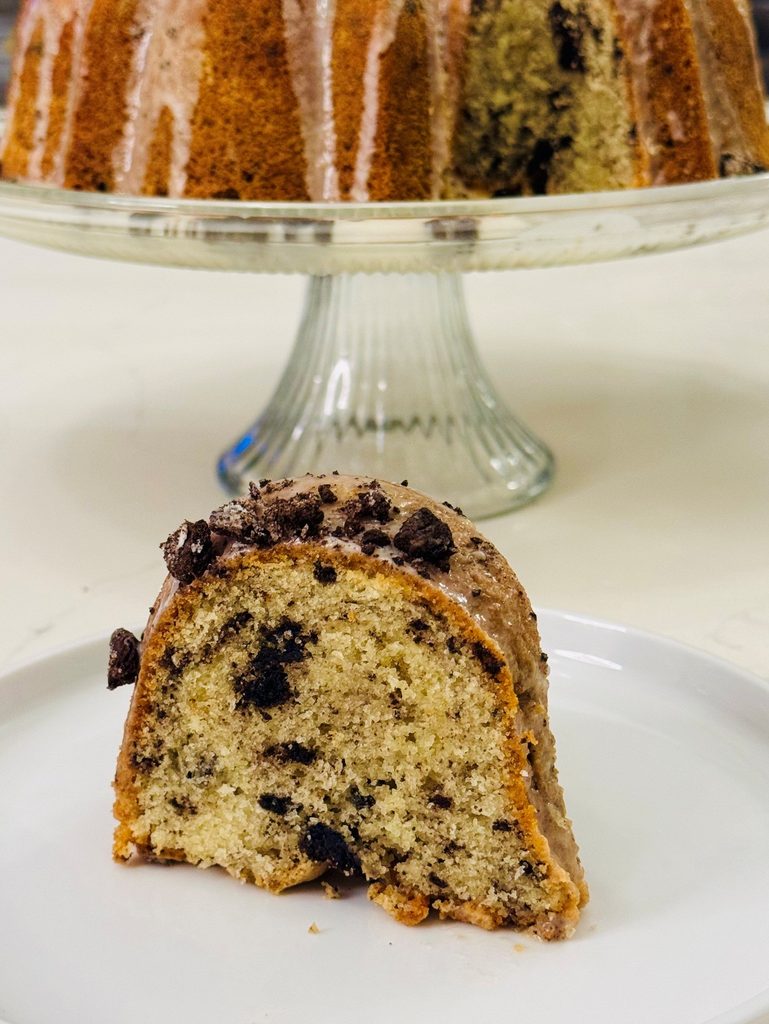
How to Prepare Oreo Pound Cake
Ingredients:
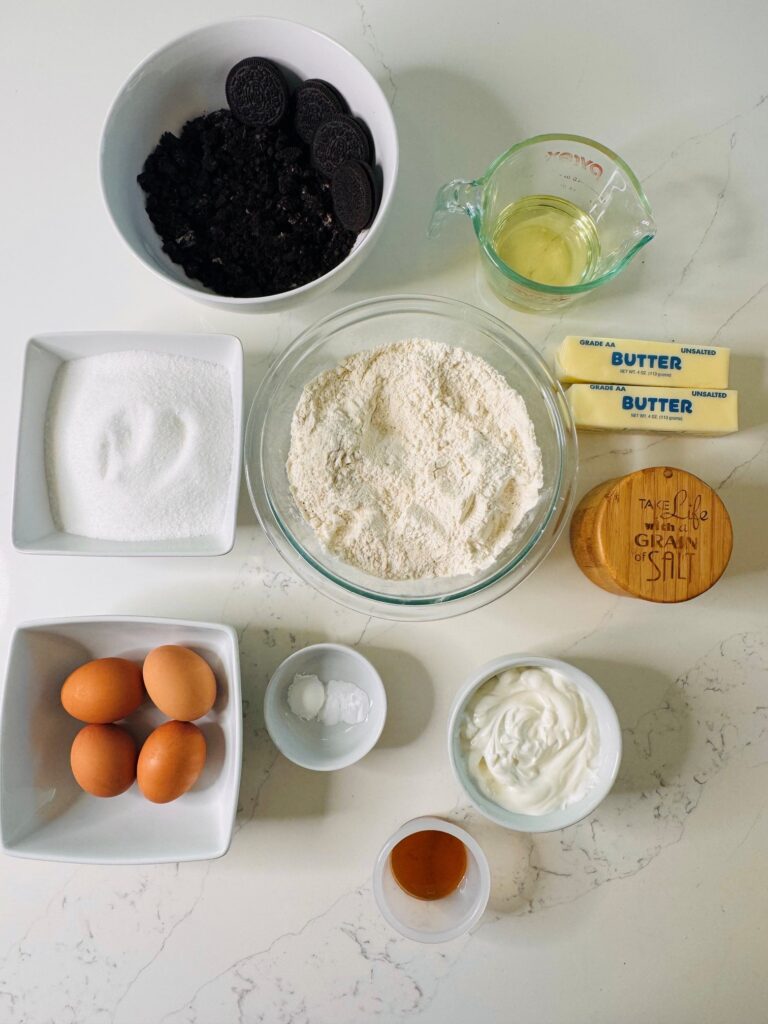
For the Cake:
- Butter – The foundation of a great pound cake. Butter adds that rich, creamy flavor and tender crumb that makes every bite melt in your mouth. It also helps give the cake its beautiful golden color and classic homemade aroma.
- Vegetable oil – A little oil ensures extra moisture, keeping the cake soft and fluffy even after it cools. It’s the secret to that perfect texture that stays tender for days.
- Sugar – Sweetness with purpose—sugar not only flavors the cake but also helps create a light, delicate texture by creaming beautifully with the butter.
- Eggs – Eggs add structure, richness, and that velvety smooth consistency we love in pound cake. They bind everything together while giving the batter a luscious shine.
- All-Purpose Flour – The backbone of the recipe. It gives the cake its form while keeping the texture dense enough to hold all those crushed Oreos without feeling heavy.
- Sea Salt – Just a pinch of sea salt brings balance, enhancing the sweetness and deepening the flavor. That subtle hint of salt makes the chocolate and cream notes pop even more.
- Baking Powder & Baking Soda – This duo helps the cake rise perfectly, creating that soft, cloud-like texture while still holding true to the traditional pound cake richness.
- Sour Cream – A baker’s best friend! Sour cream adds moisture and a subtle tang that balances the sweetness while giving the cake a creamy, dreamy crumb.
- Vanilla Extract – The heart of the cookies-and-cream flavor. Pure vanilla rounds out the richness and ties all the ingredients together with a warm, inviting aroma.
- Oreos – The star of the show! Crushed Oreos add texture, crunch, and that unmistakable chocolate-cookie flavor that transforms a classic pound cake into a cookies-and-cream dream.
For the glaze:
- Confectioners sugar (powdered sugar) -The foundation of this sweet, silky glaze. Also known as powdered sugar, it dissolves easily into the milk, creating a smooth icing that drizzles beautifully over the cake and sets to a delicate finish.
- Milk – Helps thin the confectioners’ sugar into a smooth, pourable glaze. Adding the milk gradually allows you to control the consistency, ensuring the icing is thick enough to cling to the cake while still flowing beautifully down the sides.
- Vanilla extract – Adds a warm, sweet vanilla flavor that complements the rich, buttery cake and enhances the classic cookies-and-cream taste. Just a little vanilla brings the glaze together, creating the perfect finishing touch for this Oreo Pound Cake.
- Crushed Oreos – The perfect finishing touch! Sprinkled over the freshly drizzled vanilla glaze, crushed Oreos add a delicious chocolate crunch and extra cookies-and-cream flavor. They also give the cake a beautiful, bakery-style finish that makes every slice even more irresistible.
Simple Steps:
Step 1: Bring ingredients to room temperature
Before you start baking, make sure your butter is softened and your eggs and sour cream are at room temperature.
- Butter: Takes about 30–45 minutes at room temp to soften perfectly—soft enough to press gently with your finger but not melted.
- Eggs: Usually reach room temperature in 20–30 minutes when left on the counter.
- Sour Cream: Set it out for about 30 minutes to take the chill off.
Bringing these ingredients to room temperature helps them blend smoothly, creating a tender and evenly textured cake.
Step 2: Preheat the oven
Set your oven to 325°F (163°C) so it’s ready when your batter is done. Grease and flour your Bundt pan to prevent sticking.
Step 3: Mix the dry ingredients
In a separate bowl, whisk together the all-purpose flour, sea salt, baking powder, and baking soda. This evenly distributes the leavening agents so your cake rises evenly and bakes with a consistent crumb.
Step 4: Cream the butter, oil, and sugar
In the bowl of a stand mixer fitted with the whisk attachment, add the softened butter, vegetable oil, and sugar. Beat on medium speed for 3–5 minutes, until the mixture becomes light, fluffy, and pale in color. Perfectly creamed butter and sugar should look airy and creamy. It’s the key to a moist, well-lifted pound cake.
Step 5: Add the eggs
Crack in the eggs one at a time, whisking well after each addition. This ensures the batter stays smooth and emulsified. The consistency at this stage should be silky, slightly thick, and well-combined; not grainy or curdled. Switch from the whisk attachment to paddle attachment.
Step 6: Add the sour cream and vanilla
On low speed, mix the vanilla extract into the batter. Then add the sour cream, blending just until incorporated. The batter should look smooth, creamy, and slightly thick at this stage. This is where the moisture and rich texture really develop.
Step 7: Alternate adding the dry ingredients
Gradually add the dry ingredients to the wet mixture, mixing on low speed. Add them in two to three additions, stopping to scrape down the sides of the bowl as needed. Mix only until the flour disappears. Over mixing can make the cake dense.
Step 8: Fold in the Oreos
Using a spatula, gently fold in the crushed Oreos, reserving some for the glaze topping. This keeps the cookie pieces evenly distributed without breaking them down too much or deflating the batter.
Step 9: Transfer to pan and bake
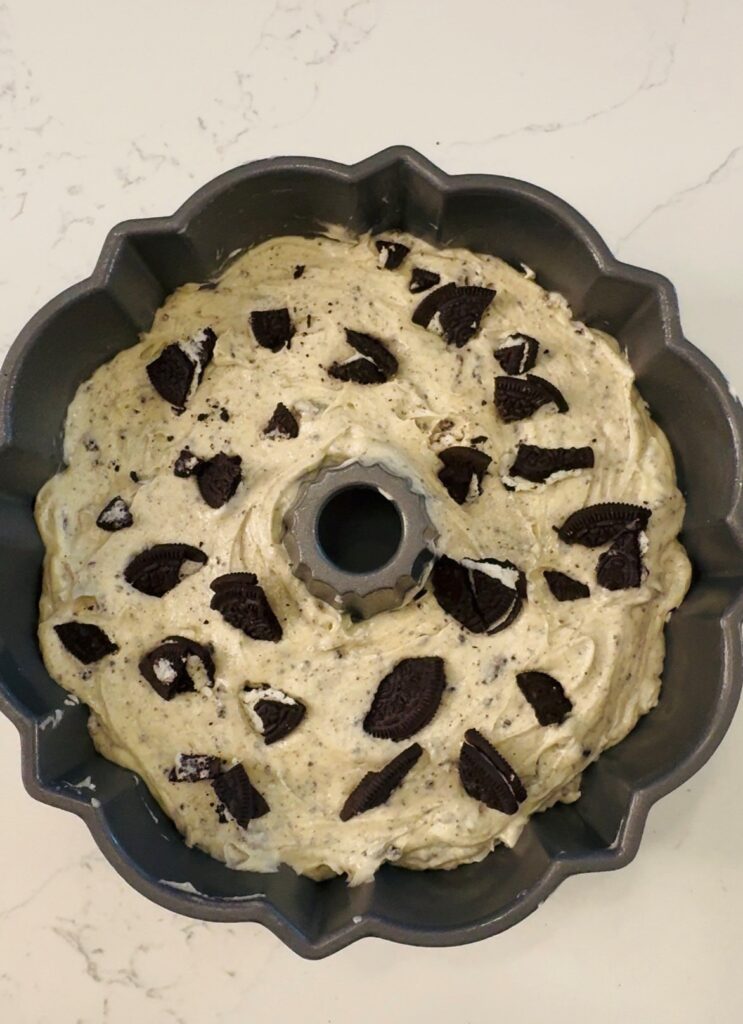
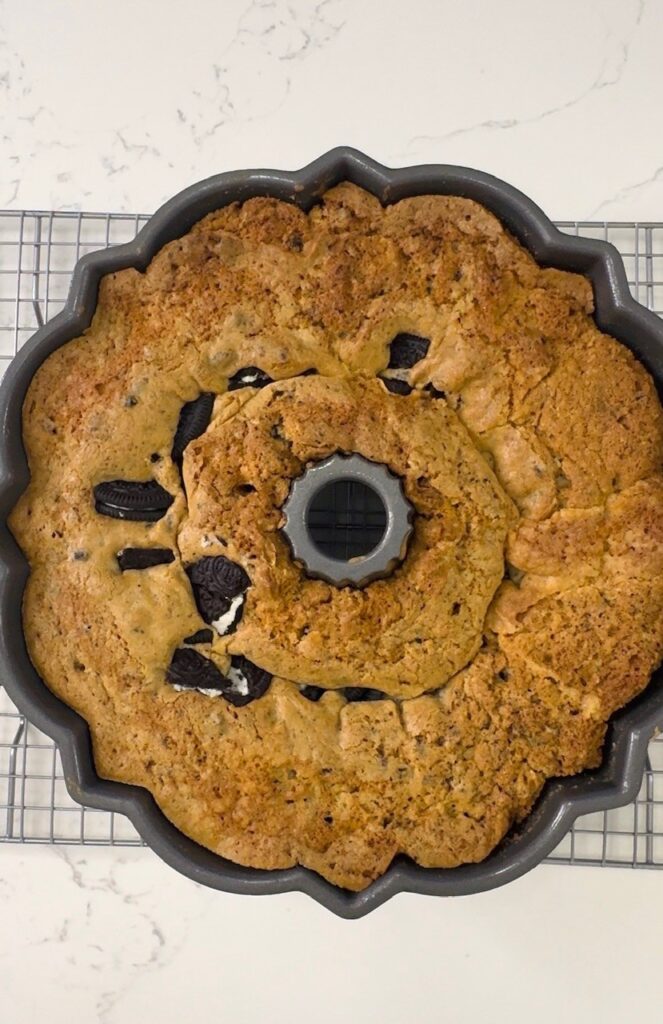
Pour the batter into your prepared pan and smooth the top. I like to add about 4 largely crushed Oreos into the batter after pouring batter into the pan. This is completely optional, unless you like a cake full of Oreos like me. Bake at 325°F for 65–80 minutes, or until a toothpick inserted into the center comes out clean or with just a few moist crumbs.
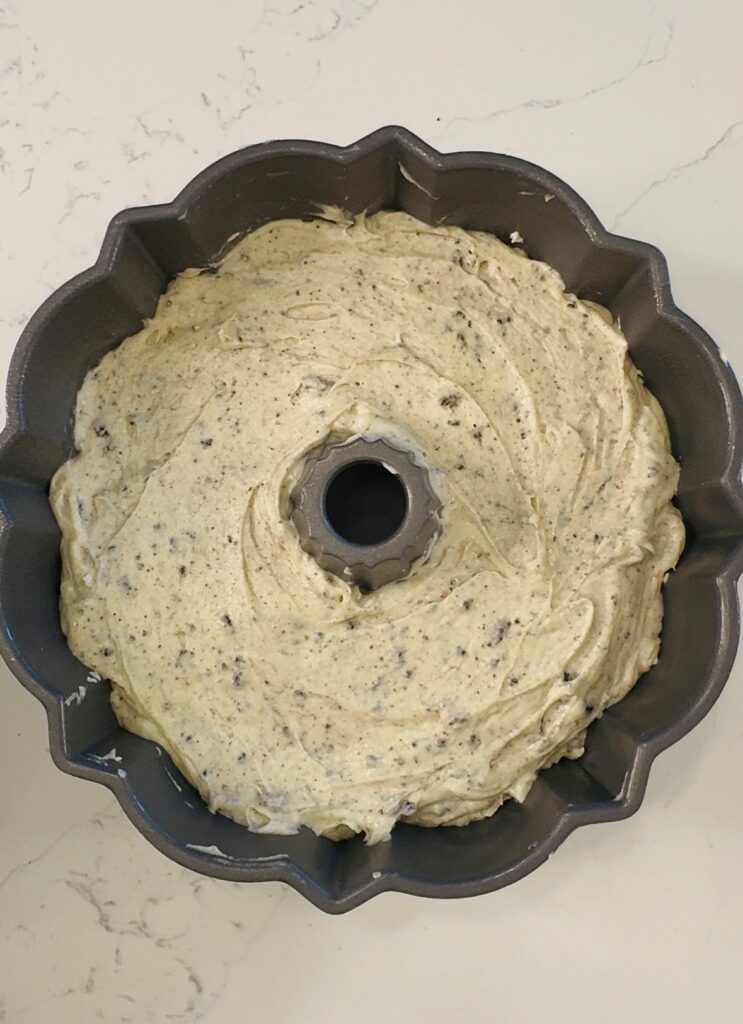
Step 10: Cool and release
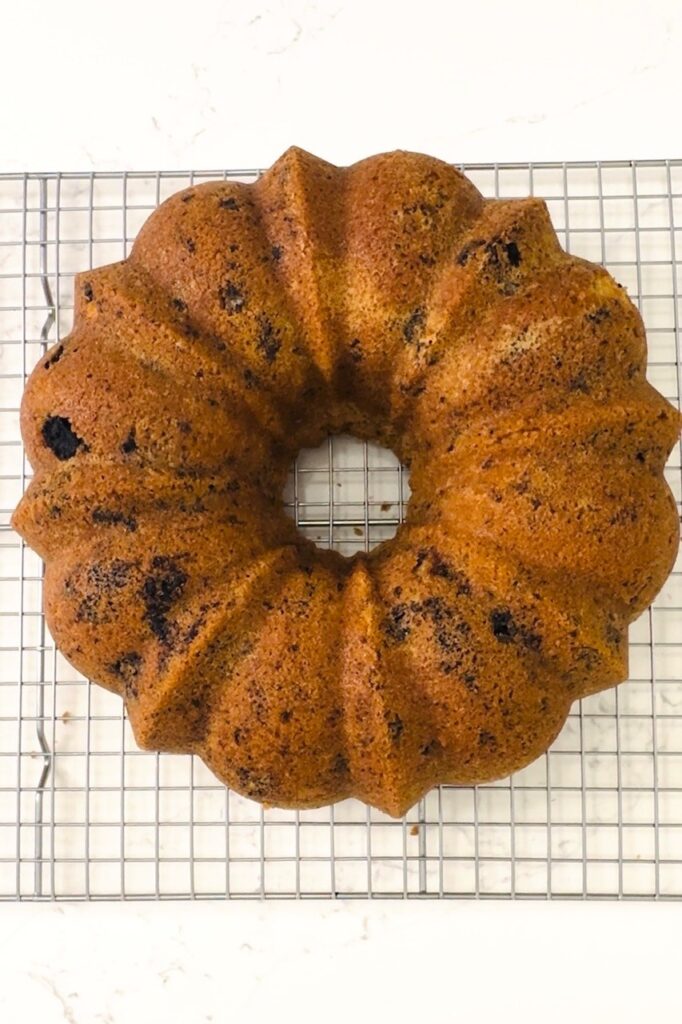
Let the cake cool in the pan for 15–20 minutes, then carefully invert it onto a wire rack to cool completely. Allowing it to cool fully helps the structure set and makes slicing clean and beautiful.
Step 11: Prepare the vanilla icing
In a medium bowl, whisk together the confectioners’ sugar and milk until smooth. Start with a small amount of milk and add a little more as needed until you reach your desired consistency. Stir in the vanilla extract. The icing should be thick enough to slowly drizzle over the cake while still flowing smoothly.
Step 12: Glaze and garnish
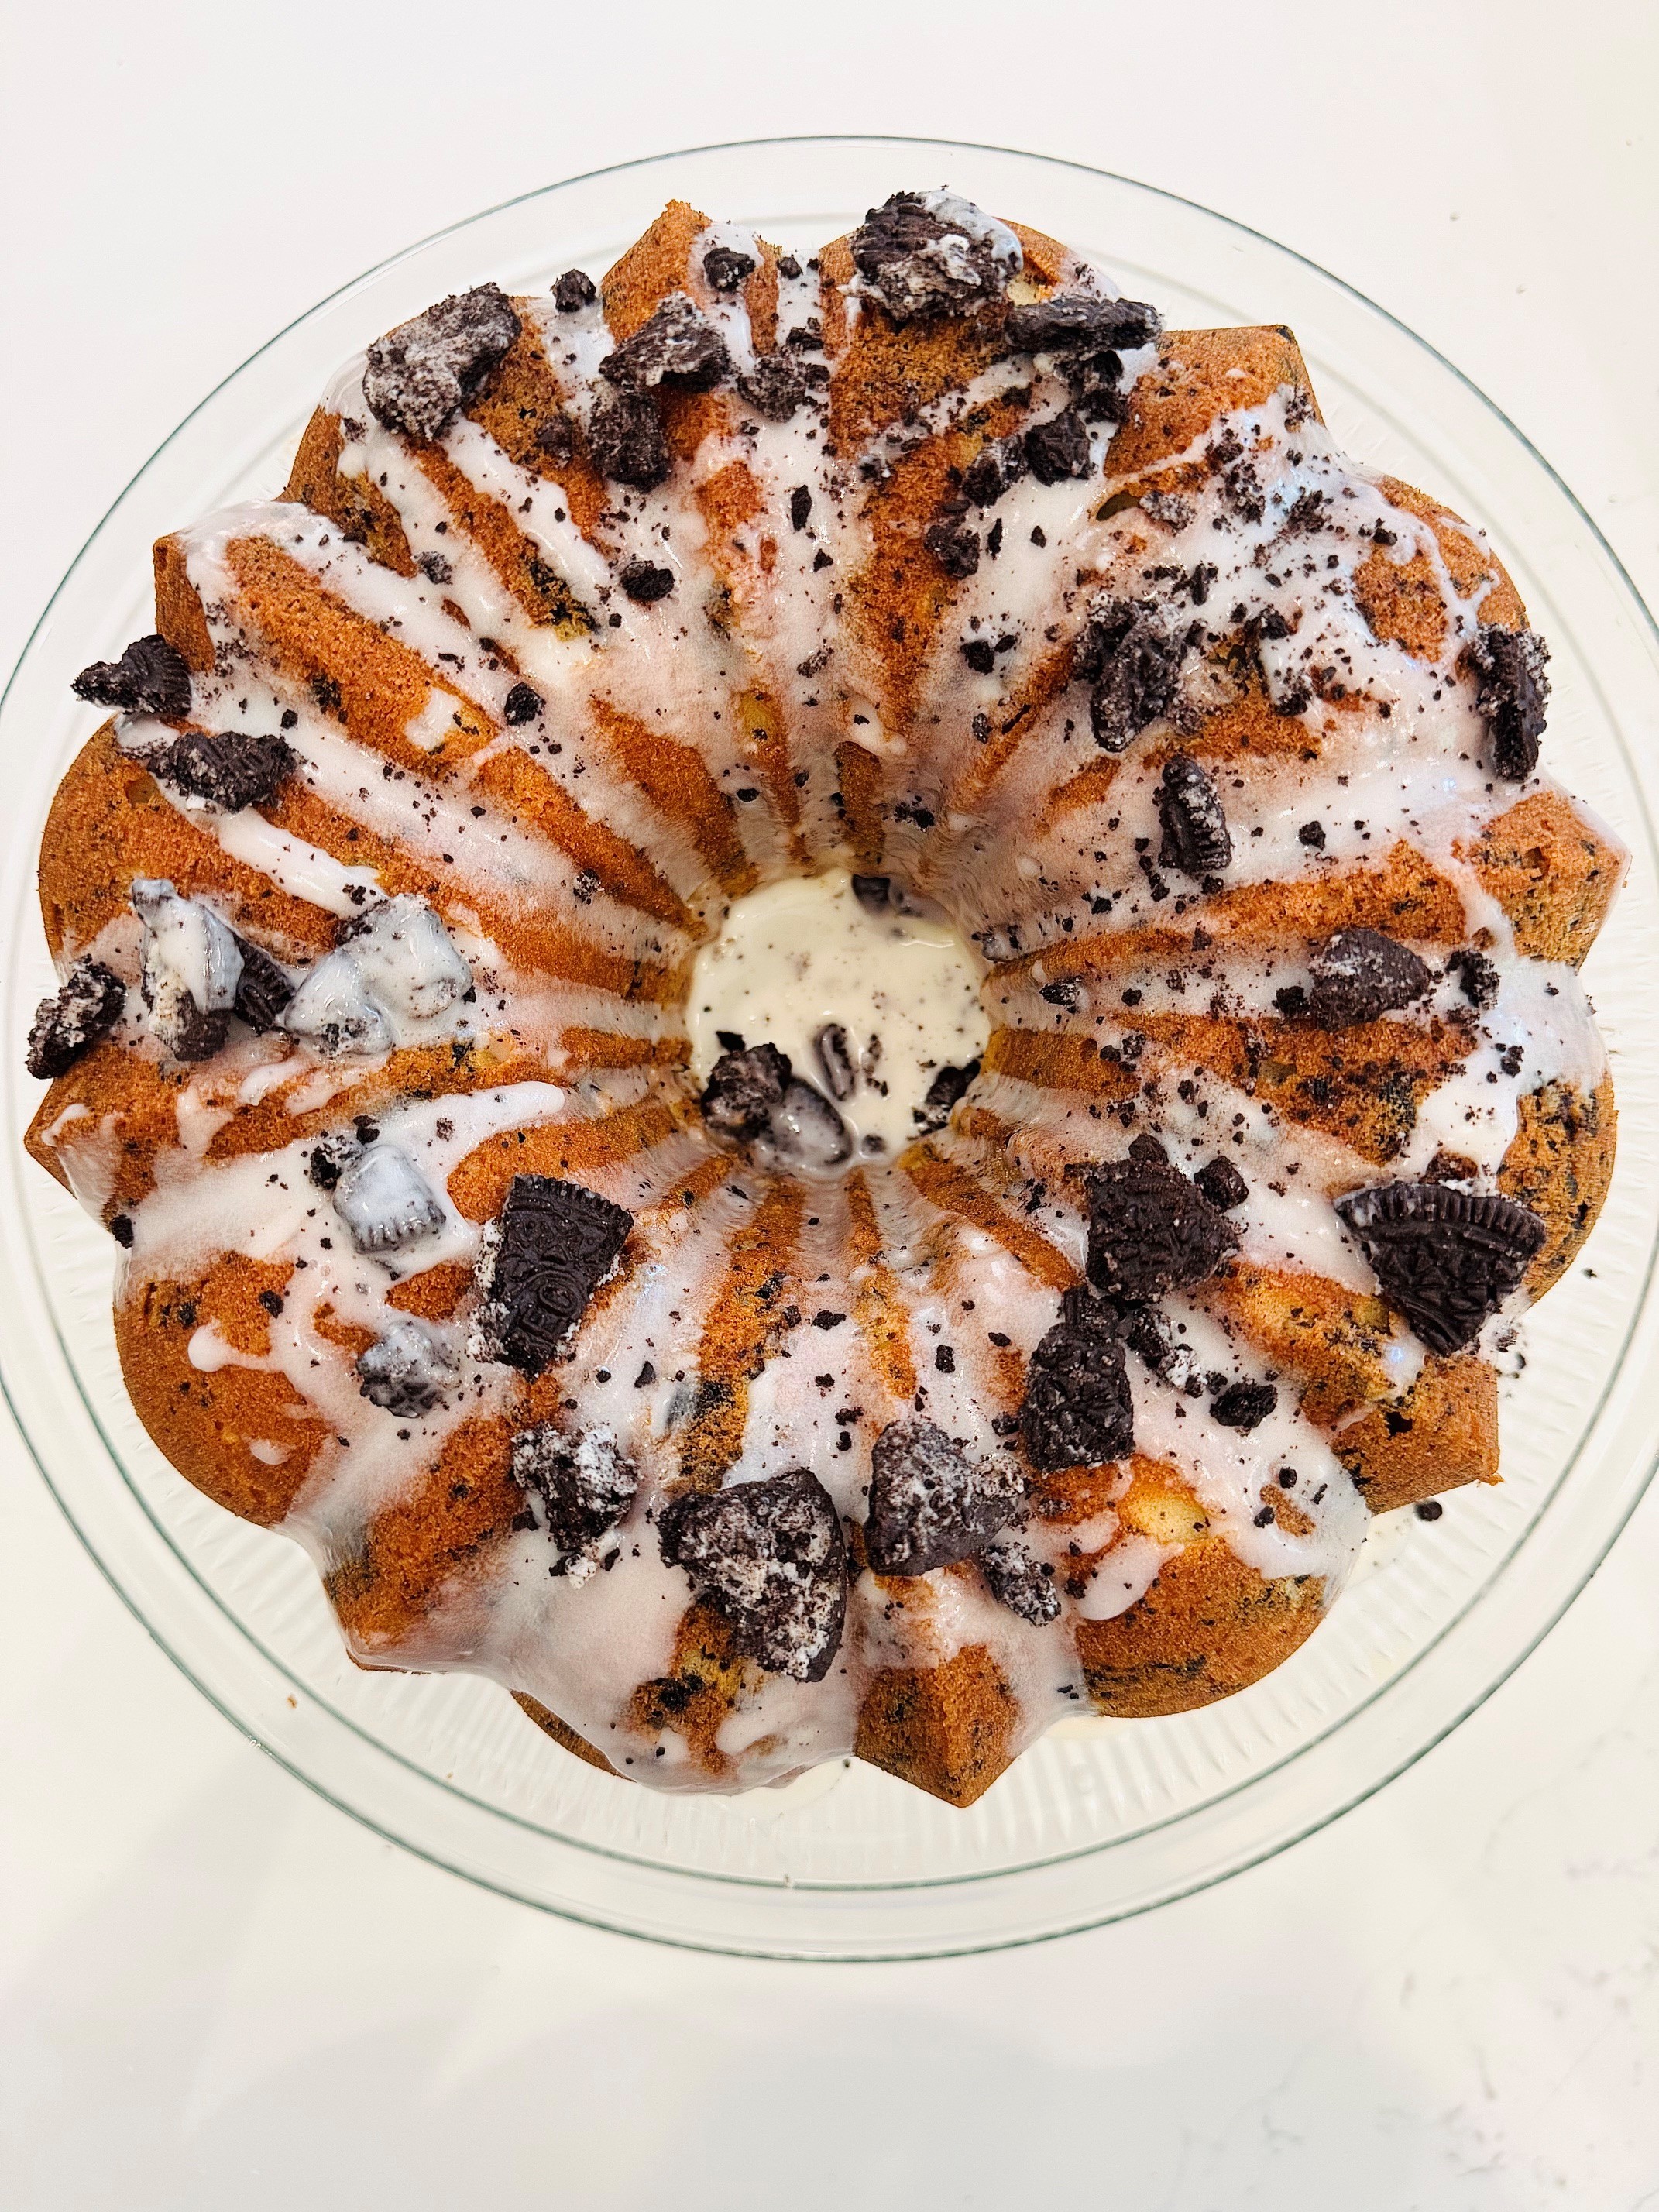
Once the Oreo Pound Cake has completely cooled, drizzle the vanilla icing evenly over the top, allowing it to naturally run down the sides. Immediately sprinkle additional crushed Oreo cookies over the icing so they adhere before it sets. Let the icing rest for 10–15 minutes before slicing and serving.
Pro Tip: For the best presentation, wait until the cake is completely cool before adding the icing. If the cake is still warm, the glaze will melt and become too thin instead of creating those beautiful drizzles over the sides.
Recommended Substitutions
While I love this Oreo Pound Cake exactly as written, here are a few simple substitutions you can make if needed.
Butter
Unsalted butter is recommended so you can control the salt in the recipe. If using salted butter, simply reduce or omit the added sea salt.
Vegetable Oil
You can substitute canola oil or another neutral-flavored cooking oil. Avoid strongly flavored oils, such as olive oil, as they may alter the taste of the cake.
Sour Cream
I recommend full-fat sour cream. However, plain full-fat Greek yogurt is an excellent substitute for sour cream. It provides the same rich texture and moisture while adding a slight tang.
Vanilla Extract
Pure vanilla extract provides the best flavor, but imitation vanilla extract can be used if that’s what you have on hand.
All-Purpose Flour
For the best results, use all-purpose flour as listed. Self-rising flour is not recommended as a direct substitute in this recipe.
Sea Salt
Kosher salt or regular table salt may be substituted. If using table salt, reduce the amount slightly since it has a finer texture and stronger salty flavor.
Oreo Cookies
Feel free to get creative! While classic Oreos are my favorite, Golden Oreos, Mint Oreos, Peanut Butter Oreos, Birthday Cake Oreos, or other limited-edition flavors can create fun variations of this recipe.
Milk (for the icing)
Whole milk creates a rich glaze, but 2% milk, half-and-half, or heavy cream all work well. Heavy cream will produce a thicker, creamier icing.
Add a Little Extra Flavor
For even more cookies-and-cream flavor, stir a handful of finely crushed Oreos directly into the icing before drizzling it over the cake.
Pro Tips:
Chef’s Tip:
Switching from the whisk attachment to the paddle attachment before adding the flour helps preserve the cake’s tender crumb. The whisk is perfect for incorporating air into the butter and sugar, while the paddle gently mixes the remaining ingredients without overworking the batter.
Tips for Greasing Your Cake Pan
One of the most important steps to baking a beautiful pound cake is properly preparing your cake pan. Even the best pound cake can stick if the pan isn’t thoroughly greased, so don’t rush this step!
My Favorite Method: Baker’s Joy®
I almost always use Baker’s Joy Quick Release Baking Spray because it combines oil and flour in one convenient spray. It creates an even, nonstick coating that helps my Oreo Pound Cake release effortlessly while preserving every beautiful detail of my Bundt pan. Hold the can about 6–8 inches from the pan and spray every surface thoroughly, making sure to coat the center tube, corners, ridges, and sides. A light, even coating is all you need. For rich cakes like pound cakes, it’s one of my favorite recommendations because it consistently gives clean releases, especially with decorative Bundt pans. Another great alternative is Pam baking spray.
The Traditional Butter (or Oil) and Flour Method
If you don’t have Baker’s Joy, you can use softened butter or vegetable shortening to grease the entire inside of the pan. Be generous, paying close attention to every groove, corner, and the center tube. Once greased, sprinkle a few tablespoons of all-purpose flour into the pan and gently rotate and tap the pan until every surface is coated. Turn the pan upside down and tap out any excess flour before adding the batter.
Cake cooling
Always wait until your pound cake has cooled completely before adding the glaze. A warm cake can cause the icing to melt and run off instead of creating those beautiful, thick drizzles.
Additional Tips for Easy Cake Release
- Don’t miss the details. Bundt pans have lots of crevices, so make sure every groove and the center tube are well coated.
- Grease the pan just before adding the batter. Preparing the pan too far in advance can allow the grease to settle or slide down the sides.
- Avoid using cooking spray with only oil. Traditional nonstick cooking sprays without flour aren’t always enough for rich pound cakes and can increase the chances of sticking.
- Let the cake cool for 15–20 minutes. Allowing the cake to rest gives it time to firm up while still being warm enough to release cleanly.
- Loosen only if necessary. If needed, gently run a thin plastic knife or small offset spatula around the outer edge and center tube before inverting the cake.
- Invert with confidence. Place a cooling rack over the pan, hold both firmly together, and flip in one smooth motion. If the cake doesn’t release immediately, gently tap the pan a few times and let gravity do the rest.
A properly prepared pan is one of the easiest ways to ensure your Oreo Pound Cake comes out with a beautiful, bakery-worthy finish every single time.
Bake the Cake Completely
One of the biggest reasons a pound cake sticks to the pan is that it wasn’t fully baked. If the center of the cake is still underdone, the crumb hasn’t had enough time to set. When you try to remove it from the pan, the soft cake can cling to the sides and bottom, causing it to tear apart.
Before removing your Oreo Pound Cake from the oven, insert a toothpick or cake tester into the thickest part of the cake. It should come out clean or with just a few moist crumbs attached—there should be no wet batter. Keep in mind that every oven bakes a little differently, so begin checking near the end of the recommended baking time, but don’t hesitate to add a few extra minutes if needed.
Once the cake is fully baked, allow it to cool in the pan for 15–20 minutes before inverting it onto a wire rack. This gives the cake enough time to firm up while still being warm enough to release cleanly. Removing it too soon can cause it to break apart, while letting it cool completely in the pan can sometimes make it more difficult to release.

Ingredients
Equipment
Method
- Preheat the oven to 325°F. Thoroughly grease a 10- to 12-cup Bundt pan with Baker's Joy Baking Spray or grease and flour the pan.
- Prepare the Oreos. Coarsely crush 18 Oreo cookies. Set aside 12 crushed Oreos for the cake batter and 6 crushed Oreos for garnishing the finished cake.
- In a medium bowl, whisk together the flour, sea salt, baking powder, and baking soda.
- In the bowl of a stand mixer fitted with the whisk attachment, cream together the softened butter, vegetable oil, and sugar for 3–5 minutes, or until the mixture is light, pale, and fluffy.
- Add the eggs one at a time, beating well after each addition until fully incorporated.
- Replace the whisk attachment with the paddle attachment.
- Mix the vanilla extract and sour cream into the butter mixture until just combined.
- Gradually add the dry ingredients to the wet ingredients in 2–3 additions, mixing on low speed just until incorporated. Scrape down the sides of the bowl as needed. Do not overmix.
- Gently fold the 12 crushed Oreos into the batter using a rubber spatula until evenly distributed.
- Pour the batter into the prepared Bundt pan and spread it evenly. I like to add about 4 largely crushed Oreo into the batter at this point. This is completely based on your preference.
- Bake for 65–80 minutes, or until a toothpick inserted into the center comes out clean or with just a few moist crumbs attached.
- Cool the cake in the pan for 15–20 minutes, then carefully invert onto a wire rack to cool completely.
- Once the cake has cooled completely, sift the confectioners' sugar into a medium mixing bowl to remove any lumps. This helps create a smooth, silky glaze.
- Add 2 tablespoons of milk a little at a time, whisking continuously until the mixture becomes smooth and creamy. Continue adding milk as needed until the glaze reaches your desired consistency.
- Pour in the vanilla extract and whisk until thoroughly mixed.
- The glaze should be thick enough to cling to the cake but thin enough to drizzle smoothly. If it's too thick, add a few drops of milk at a time. If it's too thin, whisk in a little more confectioners' sugar.
- Drizzle the glaze over the cake. Immediately sprinkle the reserved crushed Oreos over the glaze while it's still wet. Allow the glaze to set for approximately 10–15 minutes before slicing and serving.
Notes
Butter
Unsalted butter is recommended so you can control the salt in the recipe. If using salted butter, simply reduce or omit the added sea salt.Vegetable Oil
You can substitute canola oil or another neutral-flavored cooking oil. Avoid strongly flavored oils, such as olive oil, as they may alter the taste of the cake.Sour Cream
I recommend full-fat sour cream for the rich texture and moisture it adds to this cake. However, plain full-fat Greek yogurt is an excellent substitute for sour cream. It adds a slight tang.Vanilla Extract
Pure vanilla extract provides the best flavor, but imitation vanilla extract can be used if that’s what you have on hand.All-Purpose Flour
For the best results, use all-purpose flour as listed. Self-rising flour is not recommended as a direct substitute in this recipe.Sea Salt
Kosher salt or regular table salt may be substituted. If using table salt, reduce the amount slightly since it has a finer texture and stronger salty flavor.Oreo Cookies
Feel free to get creative! While classic Oreos are my favorite, Golden Oreos, Mint Oreos, Peanut Butter Oreos, Birthday Cake Oreos, or other limited-edition flavors can create fun variations of this recipe.Milk (for the icing)
Whole milk creates a rich glaze, but 2% milk, half-and-half, or heavy cream all work well. Heavy cream will produce a thicker, creamier icing.Add a Little Extra Flavor
For even more cookies-and-cream flavor, stir a handful of finely crushed Oreos directly into the icing before drizzling it over the cake.Pro Tips:
Chef’s Tip: Switching from the whisk attachment to the paddle attachment before adding the flour helps preserve the cake’s tender crumb. The whisk is perfect for incorporating air into the butter and sugar, while the paddle gently mixes the remaining ingredients without overworking the batter.Tips for Greasing Your Cake Pan
One of the most important steps to baking a beautiful pound cake is properly preparing your cake pan. Even the best pound cake can stick if the pan isn’t thoroughly greased, so don’t rush this step! My Favorite Method: Baker’s Joy® I almost always use Baker’s Joy Quick Release Baking Spray because it combines oil and flour in one convenient spray. It creates an even, nonstick coating that helps my Oreo Pound Cake release effortlessly while preserving every beautiful detail of my Bundt pan. Hold the can about 6–8 inches from the pan and spray every surface thoroughly, making sure to coat the center tube, corners, ridges, and sides. A light, even coating is all you need. The Traditional Butter (or Oil) and Flour Method If you don’t have Baker’s Joy, you can use softened butter or vegetable shortening to grease the entire inside of the pan. Be generous, paying close attention to every groove, corner, and the center tube. Once greased, sprinkle a few tablespoons of all-purpose flour into the pan and gently rotate and tap the pan until every surface is coated. Turn the pan upside down and tap out any excess flour before adding the batter.Additional Tips for Easy Cake Release
- Don’t miss the details. Bundt pans have lots of crevices, so make sure every groove and the center tube are well coated.
- Grease the pan just before adding the batter. Preparing the pan too far in advance can allow the grease to settle or slide down the sides.
- Avoid using cooking spray with only oil. Traditional nonstick cooking sprays without flour aren’t always enough for rich pound cakes and can increase the chances of sticking.
- Let the cake cool for 15–20 minutes. Allowing the cake to rest gives it time to firm up while still being warm enough to release cleanly.
- Loosen only if necessary. If needed, gently run a thin plastic knife or small offset spatula around the outer edge and center tube before inverting the cake.
- Invert with confidence. Place a cooling rack over the pan, hold both firmly together, and flip in one smooth motion. If the cake doesn’t release immediately, gently tap the pan a few times and let gravity do the rest.
No Comments